Introduction
This documentation is last updated on 3rd November 2016.
Thanks for purchasing Startable theme. If you have any question that is beyond the scope of this documentation, Feel free to ask that on our support website. You can visit this knowledge base article to learn about how to get item purchase code from themeforest.net to sign-up on our support site.
Important Note
It is highly recommended to use child theme, So that you can easily update parent theme whenever a new update becomes available. A pre-built ready to use child theme is included in the main theme pack that you might have downloaded from themeforest.
How to Update Theme
If you want to update your theme then you can consult Update Theme Using Envato WordPress Toolkit knoweldge base article for auto update OR you can consult Better Way to Update WordPress Theme knowledge base article for manual update.
Support Policy
Support Includes- Answering technical questions about theme features.
- Assistance with reported bugs and issues.
- Help with included 3rd party assets.
- Theme customization services.
- Theme installation services.
Import Demo Contents
To import demo contents you can choose one of the following methods.
- One Click Demo Import ( Automatic & Recommended )
- Import XML Contents and Configure Settings Manually
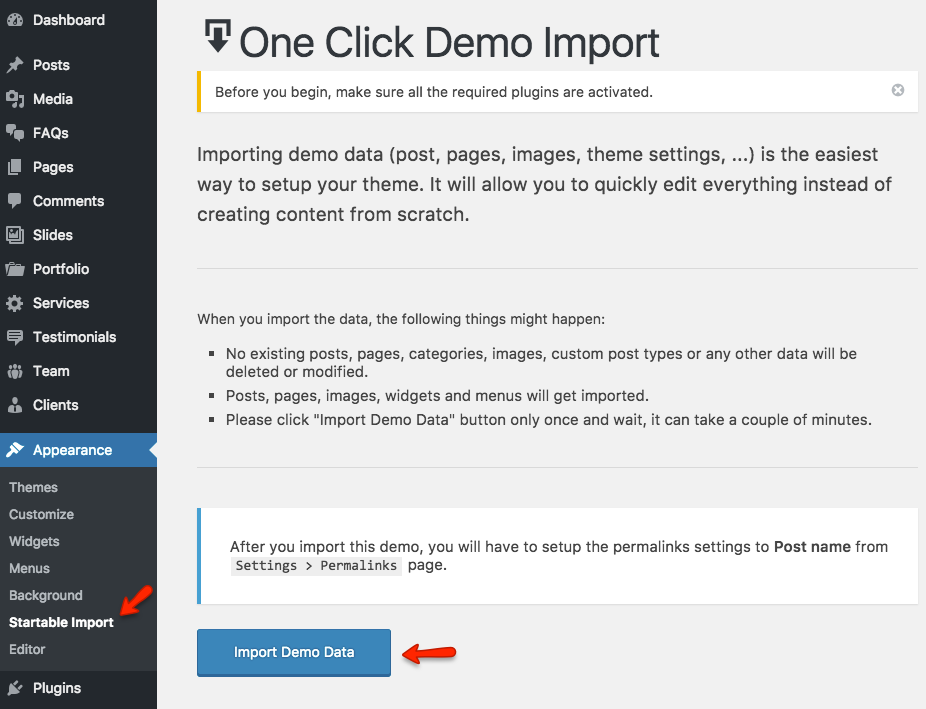
1. One Click Demo Import ( Automatic & Recommended )
Step 1
Go to Appearance > Startable Import and click Import Demo Data as displayed in image below.
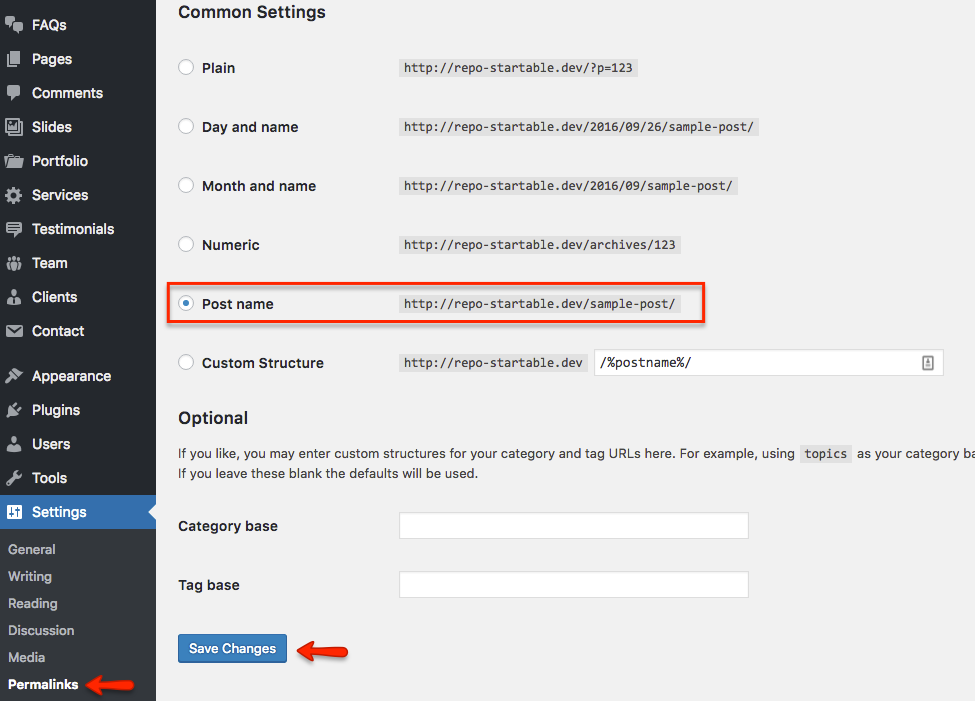
Step 2
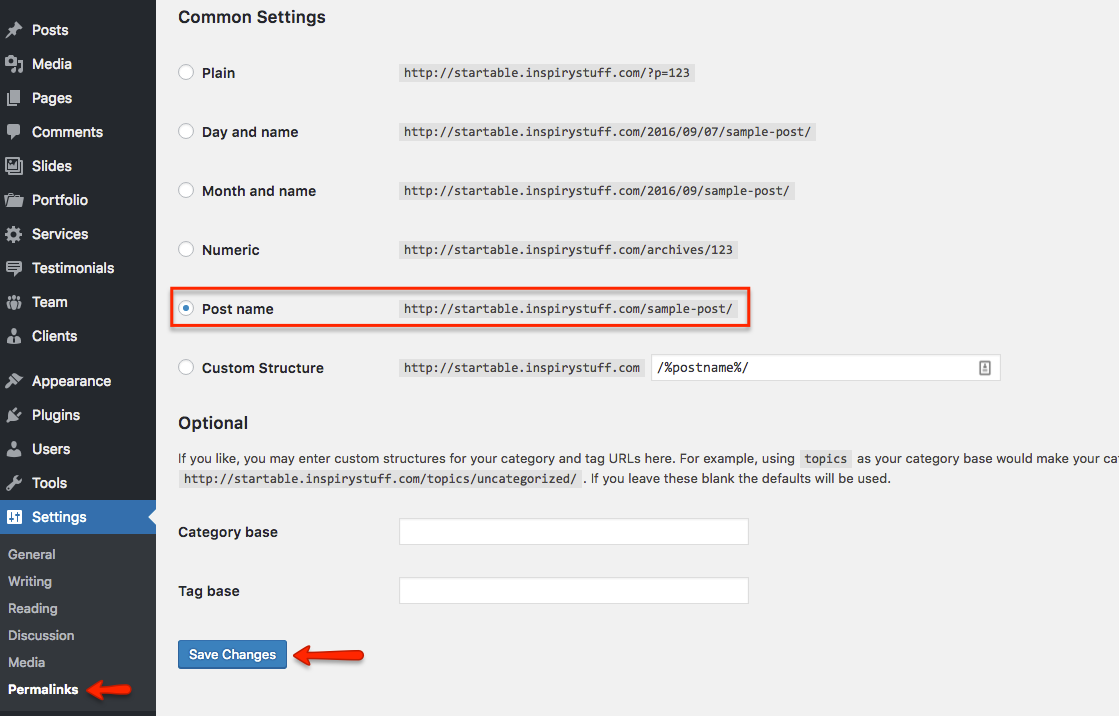
After you import the Startable demo, you will have to setup the permalinks settings to Post name from WordPress Admin > Settings > Permalinks page.
2. Import XML Contents and Configure Settings Manually
Step 1
Go to WordPress Admin > Tools > Import and click WordPress as displayed in image below.
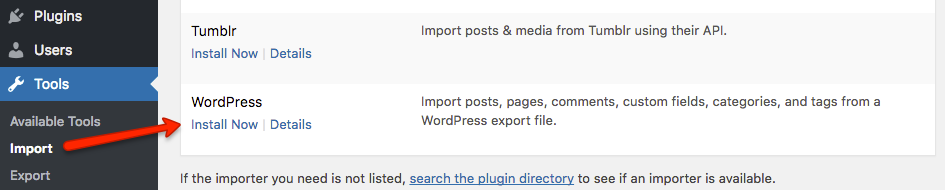
At 1st time you need to install WordPress importer plugin and run importer.
Step 2
Navigate to Demo Contents -> Import XML folder in unzipped package downloaded from themeforest and use the XML file within it.

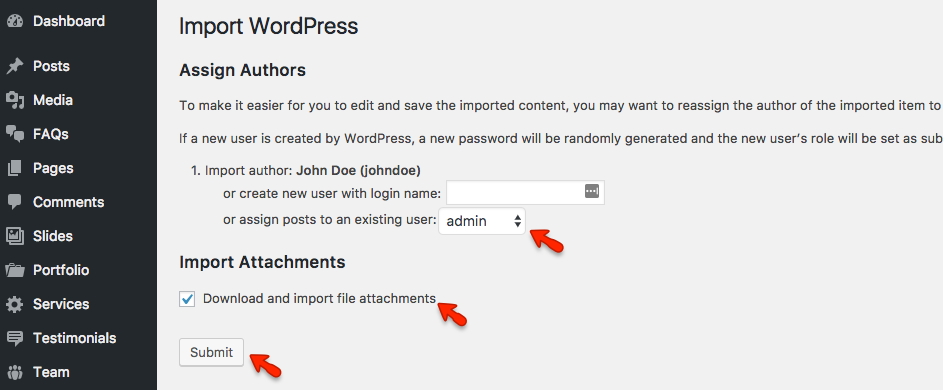
After importing XML file.
- Assign posts to an existing author.
- Mark the checkbox to download and import file attachments
- Click 'Submit' button
Import process can take a few minutes. So wait for it and try to keep the focus on current tab in your browser.
After that is done, you will have bunch of posts, pages, custom posts and other contents as on the theme demo.
Step 3
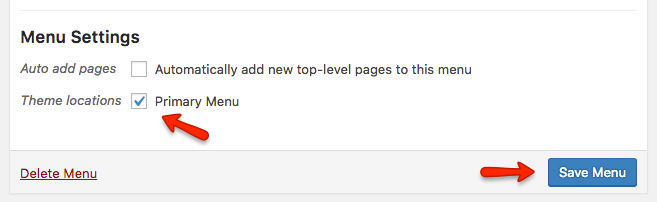
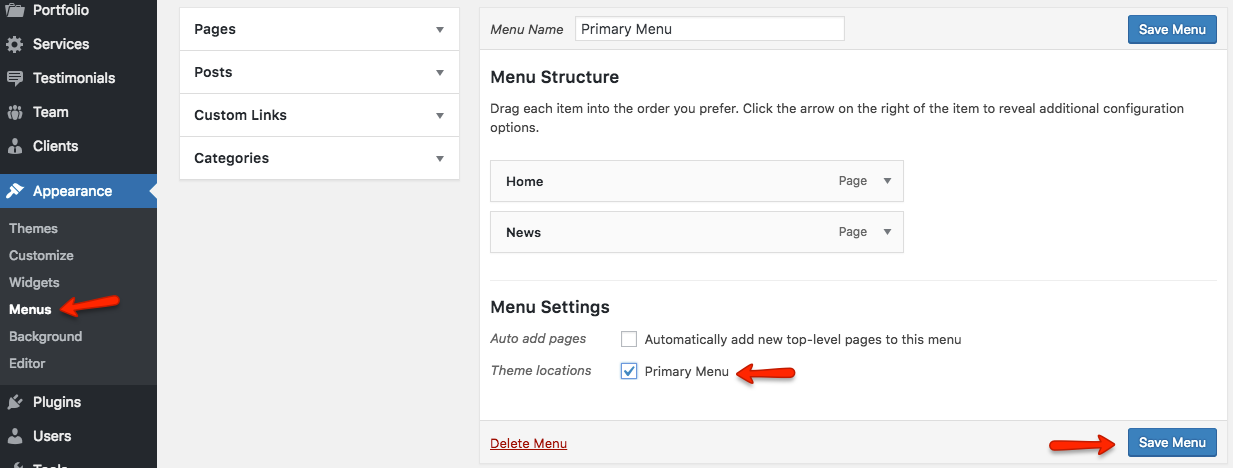
Navigate to Appearance > Menus and use the Already Imported Menu from XML and assign it to theme location "Primary Menu" from Menu Settings section below menu. After that save the menu. As pointed in screenshot below.
Step 4
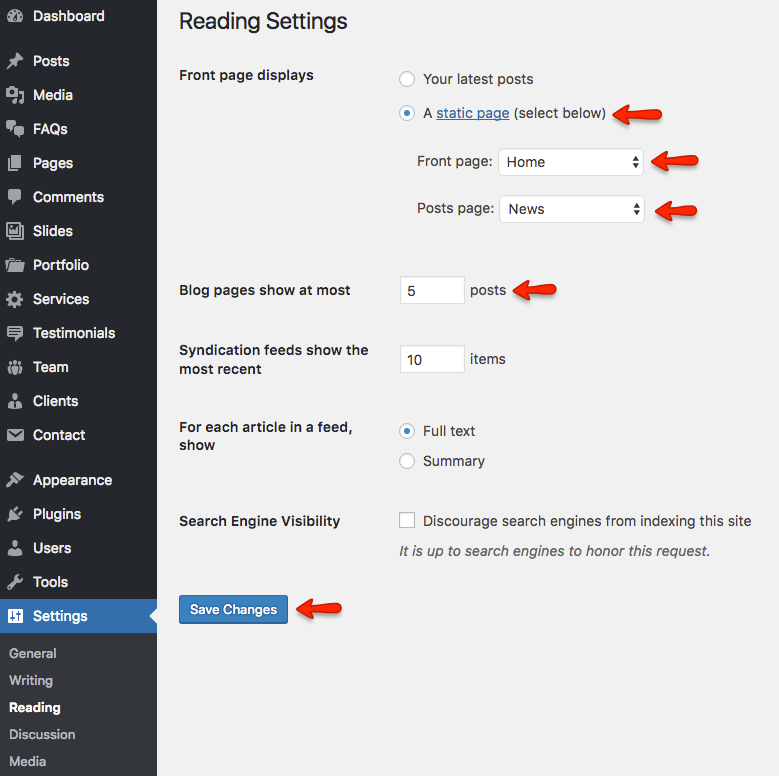
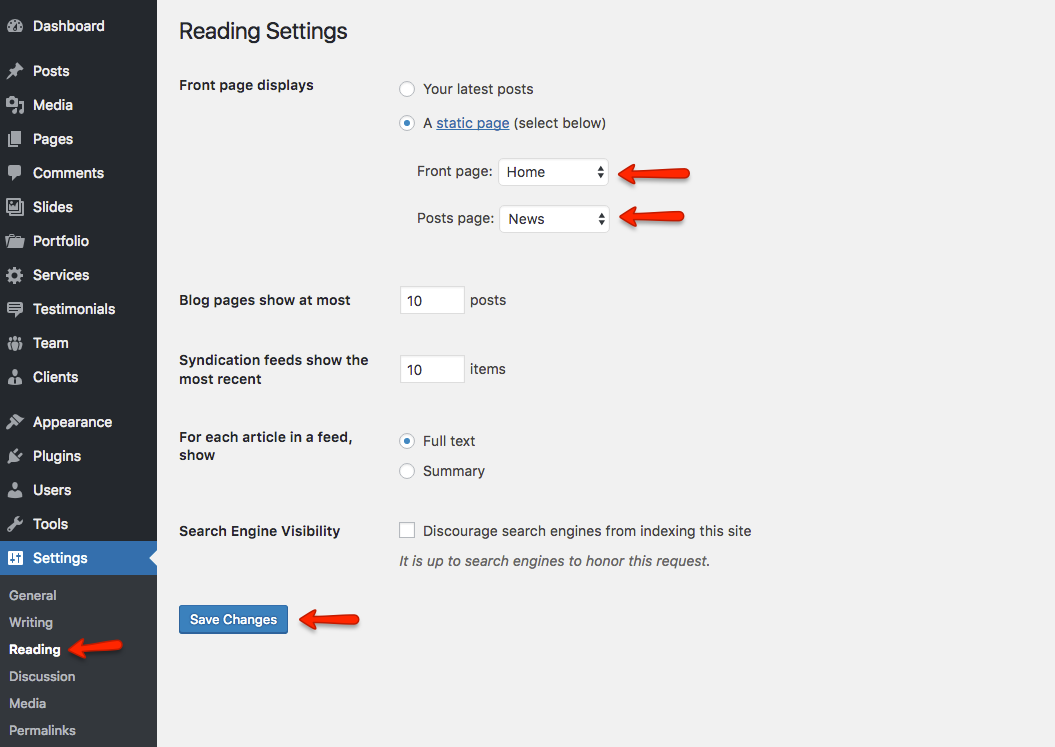
To configure reading settings you need to visit WordPress Admin > Settings > Reading and choose that front page displays as static page. Then select Home as Front Page and News as Posts Page. As, displayed in screenshot below.
Step 5
To configure permalinks settings visit WordPress Admin > Settings > Permalinks and configure then save it as displayed in image below.
Next Step is to Import Customizer Settings (important)
Step 6
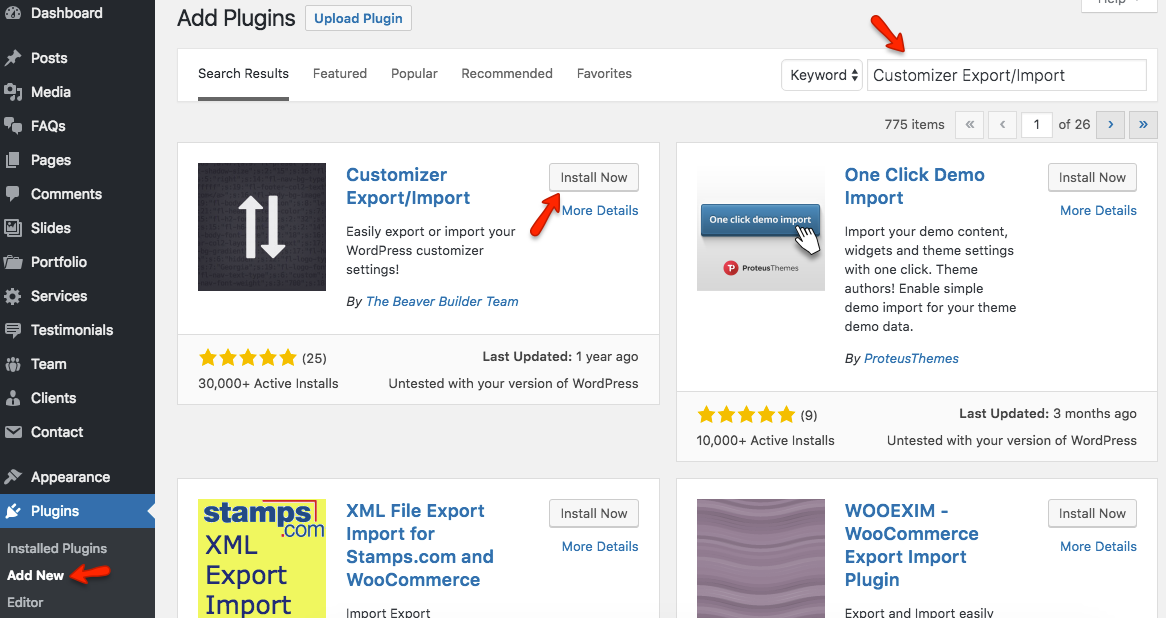
Install the Customizer Export/Import plugin. As guided in screenshot below.
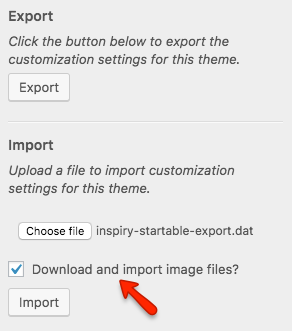
Step 7
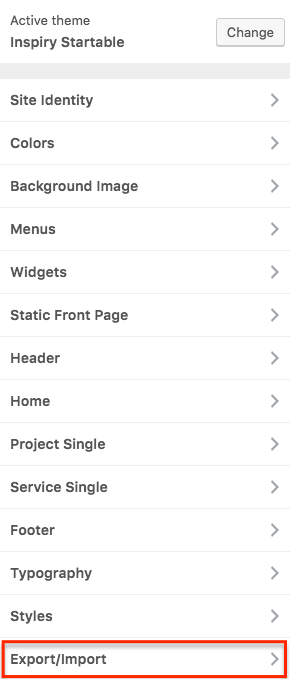
After installing and activating the plugin. Go to Customizer > Export/Import and navigate to the Demo Contents/Customizer Settings Import/inspiry-startable-export.dat file and hit the Import button.
Note: after chosing the 'inspiry-startable-export.dat' file also check the 'Download and import image files' option.
Install Theme
To start you must have a working version of WordPress. Almost all major web hosts provides one click WordPress install and you can consult your host's help site for more information in this regard. For manual install you can consult WordPress Codex Installing WordPress.
Once you have a working version of WordPress, You need to download "All Files and Documentation" from themeforest download page and extract the downloaded zip to get various files including inspiry-startable.zip.
Install Theme Via WordPress Dashboard ( Recommended Way )
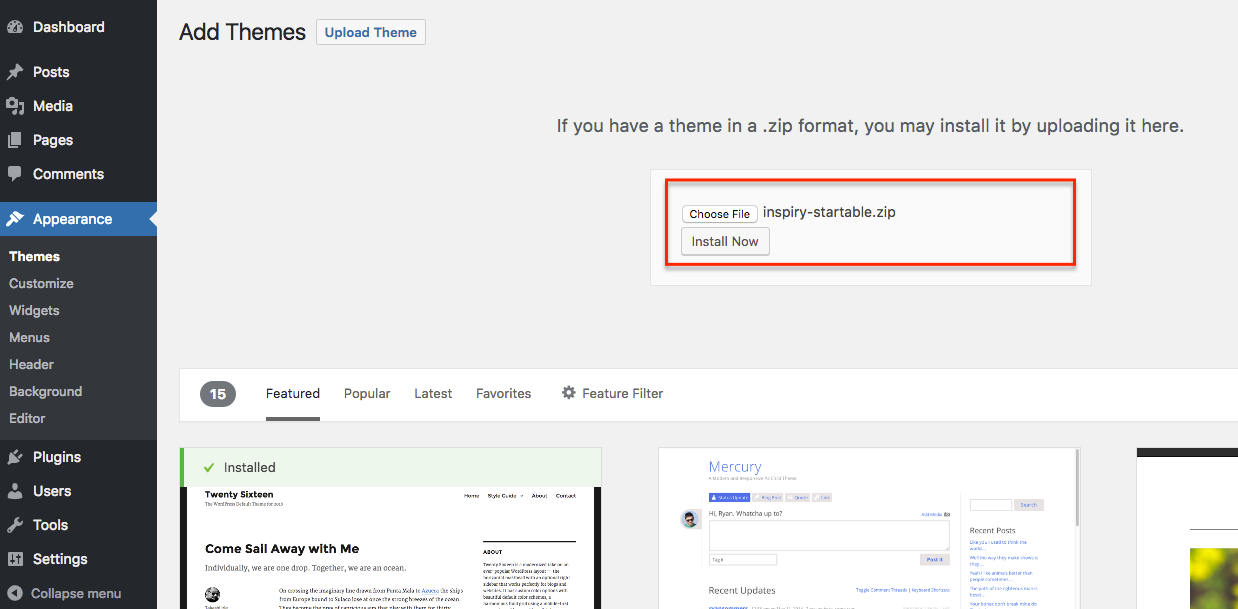
- Go to 'Appearance > Themes' section
- Click 'Add New' and select the 'Upload Theme' option
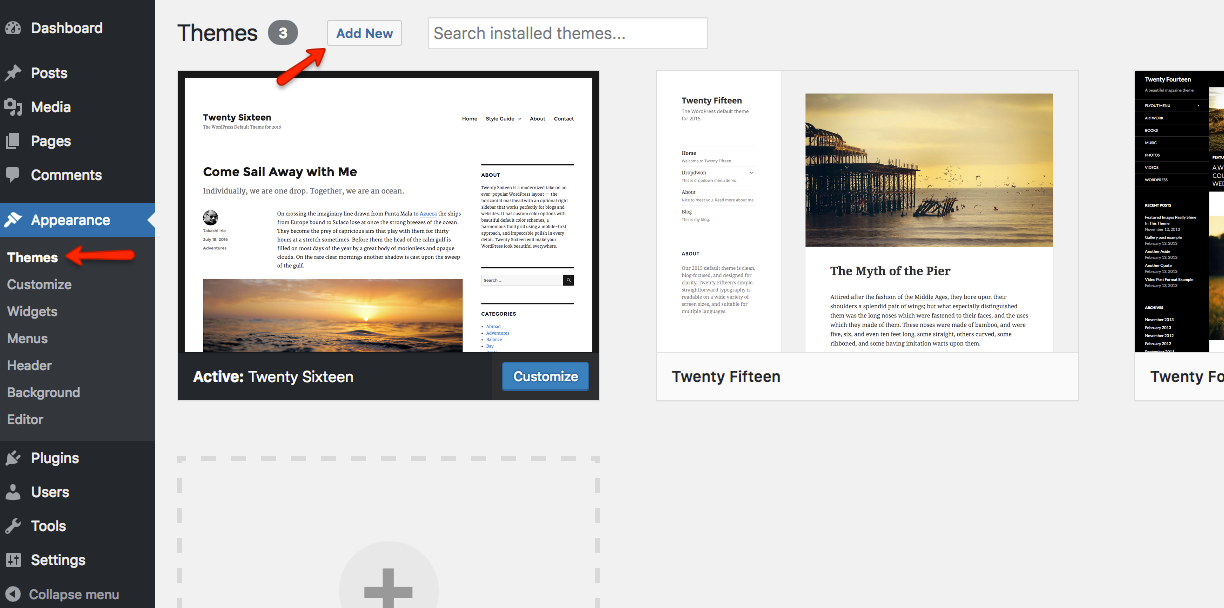
- Click 'Upload Theme'
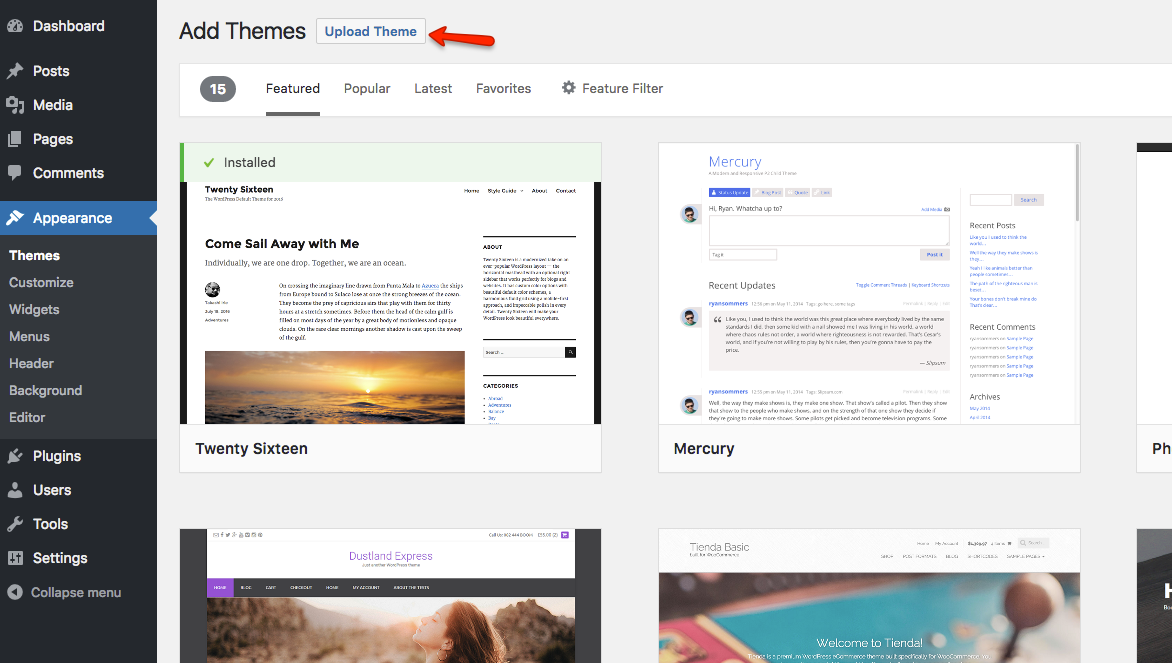
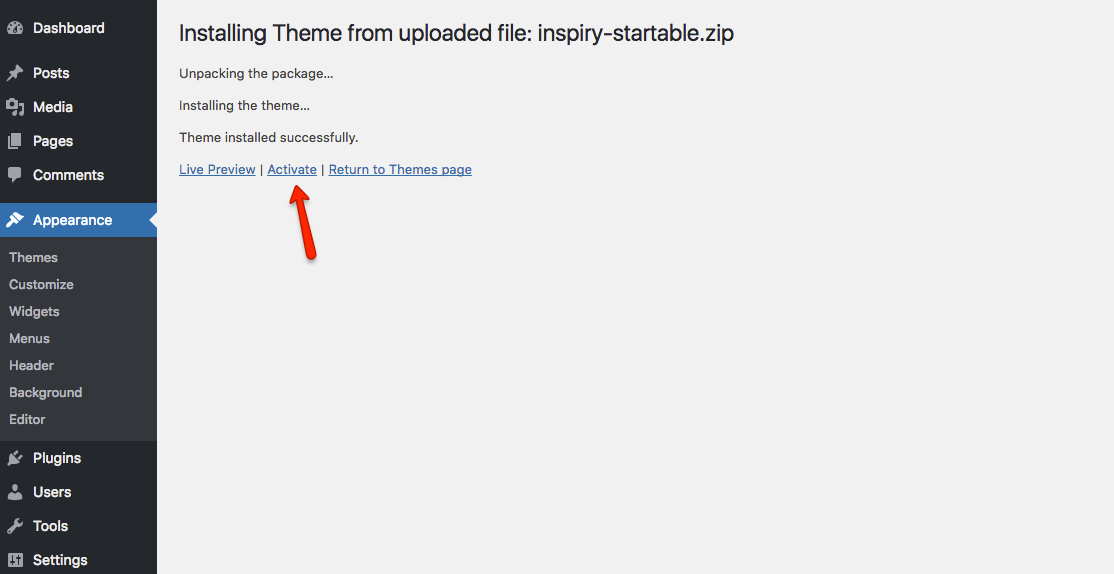
- Choose the inspiry-startable.zip file and press 'Install Now'
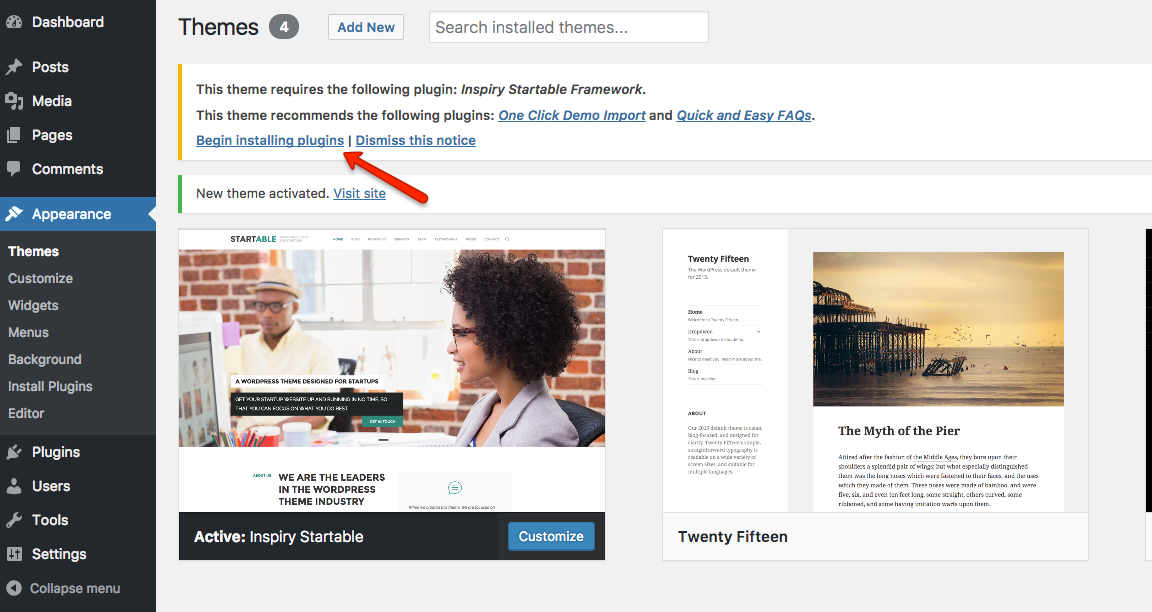
- Once the theme is uploaded you need to activate it.
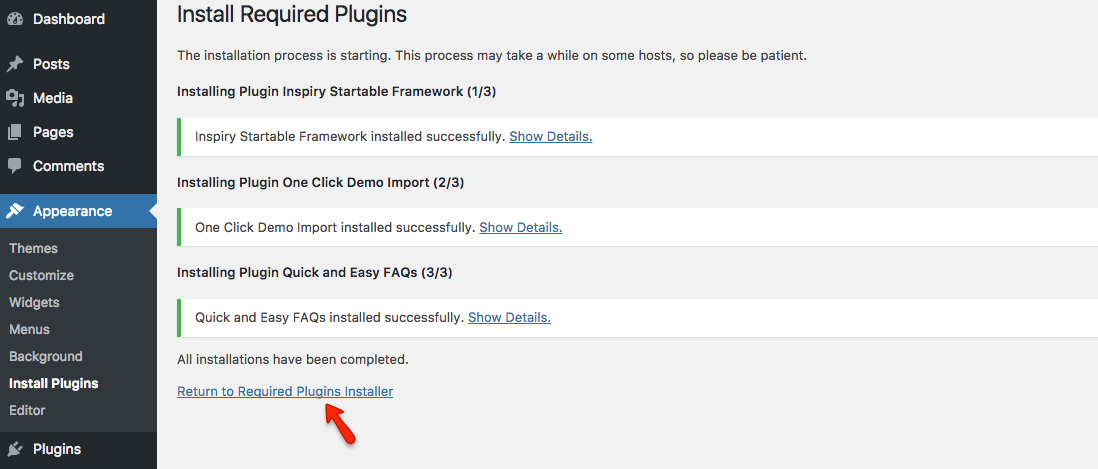
- After activation click on the 'Being activating plugin' button to install Inspiry Startable Framework plugin (required), One Click Demo Import and Quick and Easy FAQs plugin (recommended).
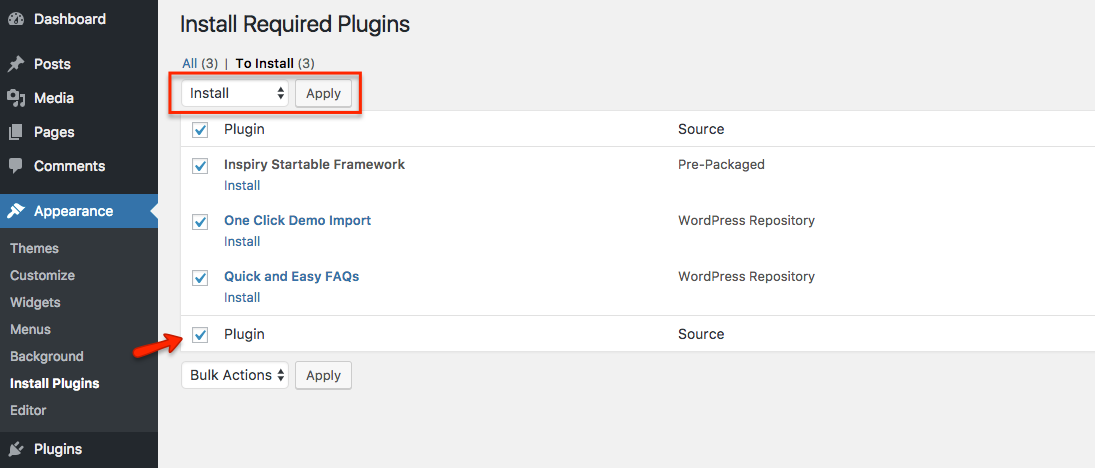
- Check the Inspiry Startable Framework, One Click Demo Import and Quick and Easy FAQs plugins boxes, select 'Install' action and apply.
- Once all plugins are installed. Click on the 'Return to Required Plugins Installer' link.
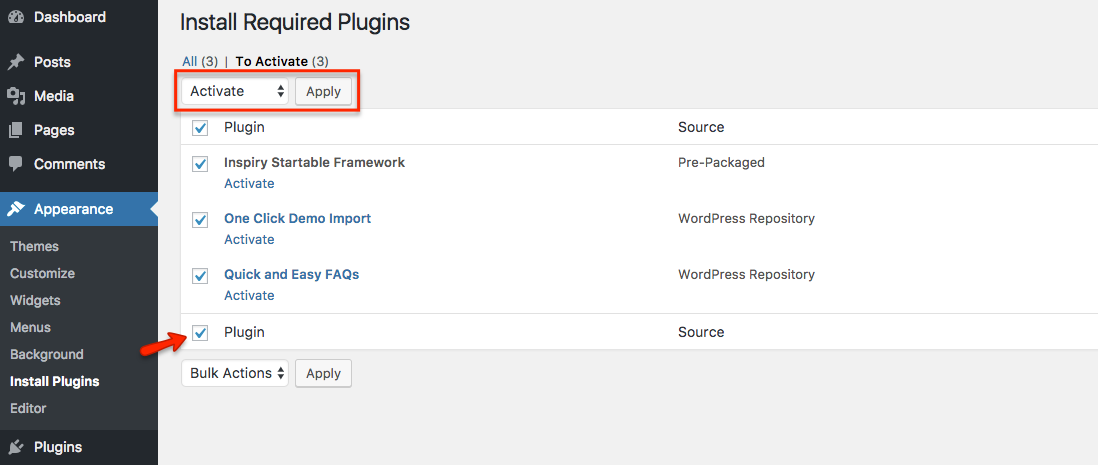
- Check the Inspiry Startable Framework, One Click Demo Import and Quick and Easy FAQs plugins boxes, select 'Activate' action and apply.
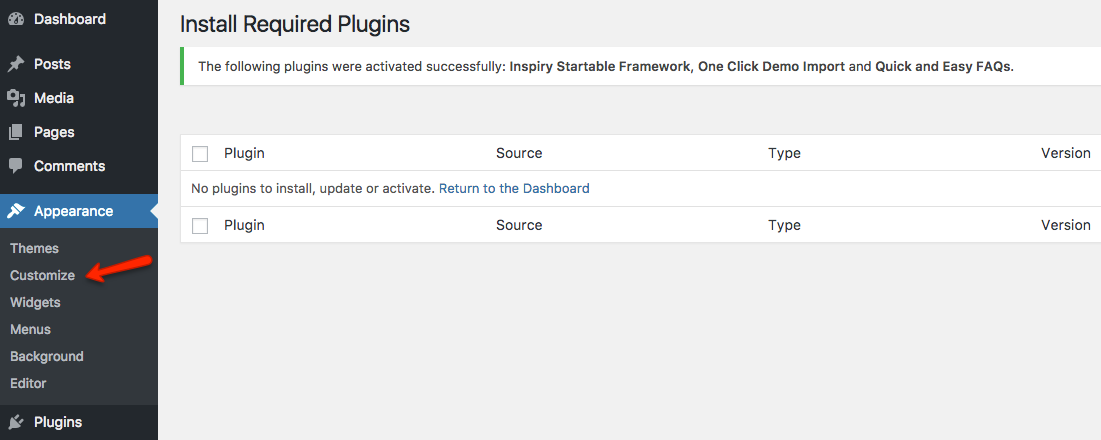
- After activation go to "Appearance > Customize" to play with theme's settings.
if you face any problem during upload through dashboard, please upload the theme using FTP as guided below.
Install Theme Via FTP ( Alternative Way )
- Access your hosting server using an ftp client like FileZilla
- Go to the 'wp-content/themes' folder of your WordPress installation
- Extract the inspiry-startable.zip file and put the inspiry-startable folder in 'wp-content/themes/' folder
- Go to 'WordPress Dashboard > Appearance > Themes' section to activate the theme
- After activation go to "Appearance > Customize" to play with theme's settings.
Install Child Theme ( Highly Recommended )
It is highly recommended to use child theme, So that you can easily update parent theme whenever a new update becomes available. A pre-built ready to use child theme is included in the main theme pack that you have downloaded from themeforest.
To install child theme, You need to upload the inspiry-startable-child.zip and activate it in the same way as you have uploaded and activated parent theme's inspiry-startable.zip.
Next Step is to Import Demo Contents
Create Home & News Pages
In case of Demo Contents Import the home page and news page are already created and you do not need to follow this section.
Create Home Page
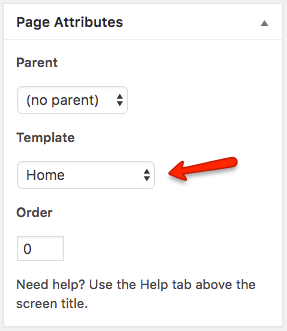
To create Home page you need to create a new page, Go to Pages > Add New. You can give this page a title "Home" yet you do not need to include any contents for now. Select the “Home” template from the Page Attributes section, as displayed in the screenshot below and click “Publish”.
Create News Page
To create News page you need to create a new page, Go to Pages > Add New. You can give this page a title "News" yet you do not need to include any contents. Select the “Default Template” template from the Page Attributes section and click “Publish”.
Configure Reading Settings
Now you need to configure reading settings, Go to WordPress Admin > Settings > Reading and choose the front page displays as static page. Then select Home as Front Page and News as Posts Page. As, displayed in the screenshot below.
Configure Pretty Permalinks
To configure pretty permalinks, Go to WordPress Admin > Settings > Permalinks and change it as displayed in the screenshot below.
Configure Primary Menu
Navigate to Appearance > Menus and create a new menu with any name you like. Assign the newly created menu to theme location "Primary Menu" from Menu Settings section below menu. After that save the menu. As pointed in the screenshot below.
Add News Post
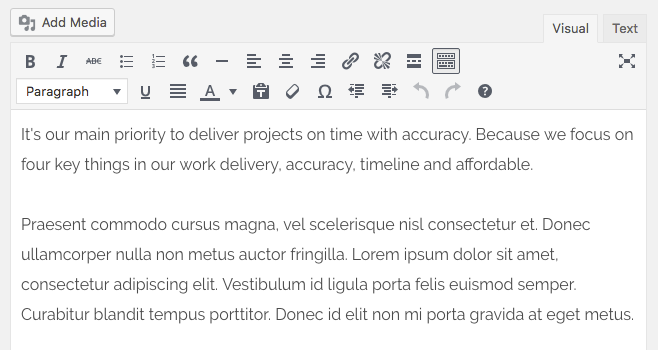
Go to WordPress Admin > Posts > Add New- Provide the post title

- Provide the post contents

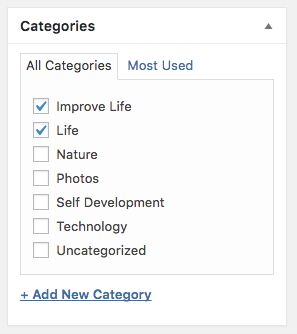
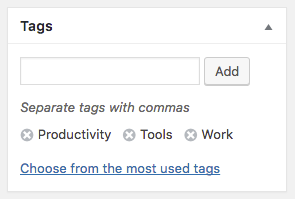
- Add or select the related category
- Add or select the related tags
-
Provide the featured image. The image should have minimum width of 750px and minimum height of 393px. The bigger size images will be cropped automatically.
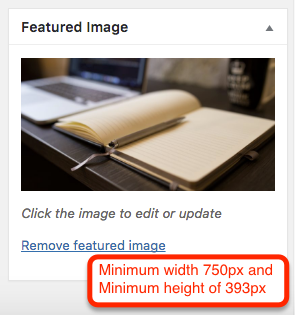
- Publish the post once it is ready.
Add Portfolio Post
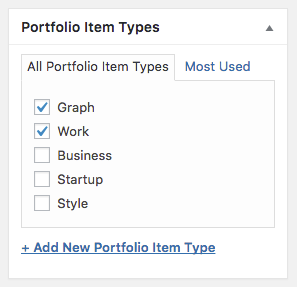
Go to WordPress Admin > Portfolio > Add New- Provide the portfolio title

- Provide the portfolio contents
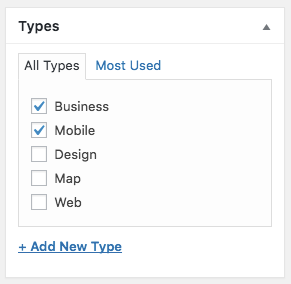
- Add or select the portfolio item types
- Add portfolio item details

-
Provide the portfolio item featured image. The image should have minimum width of 1100px and minimum height of 480px. The bigger size images will be cropped automatically.
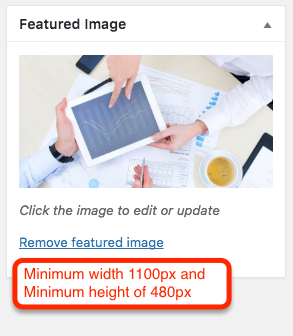
- Publish the portfolio item post once it is ready.
Add Service Post
Go to WordPress Admin > Services > Add New- Provide the service title

- Provide the service contents
- Add or select the service types
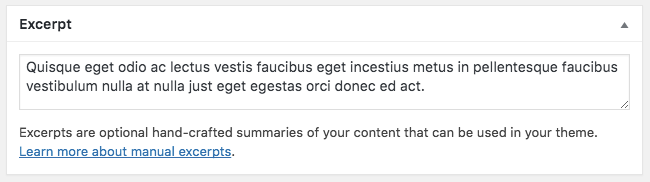
- Add service excerpt that will be shown on the homepage and services listing page for this service post.
-
Provide the service icon sized featured image. The bigger size images will not be cropped.
- Publish the service post once it is ready.
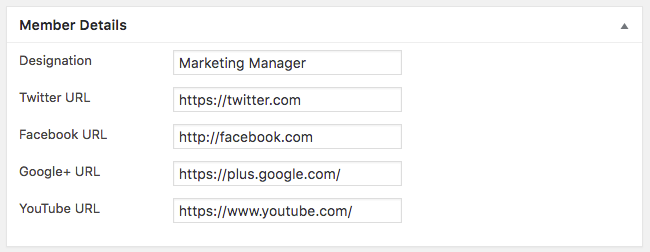
Add Team Member Post
Go to WordPress Admin > Team > Add New- Provide the team member title

- Add team member details.
-
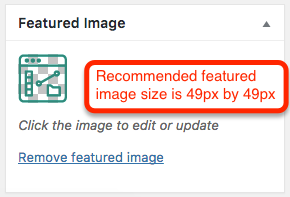
Provide the team member featured image. The image should have minimum width of 400px and minimum height of 410px. The bigger size images will be cropped automatically.

- Publish the team member post once it is ready.
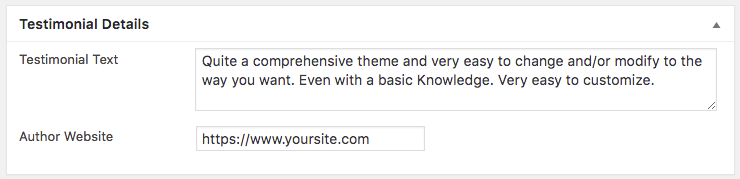
Add Testimonial Post
Go to WordPress Admin > Testimonials > Add New- Provide the testimonial author name

- Provide the testimonial details
- Publish the testimonial post once it is ready.
Add Client/Partner Post
Go to WordPress Admin > Clients > Add New- Provide the client/partner name

- Provide the client/partner website URL

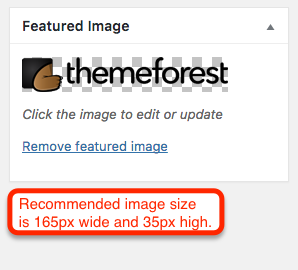
- Set the client/partner featured image. Recommended size of client/partner image is width of 165px and height of 35px high.
- Publish the client post once it is ready.
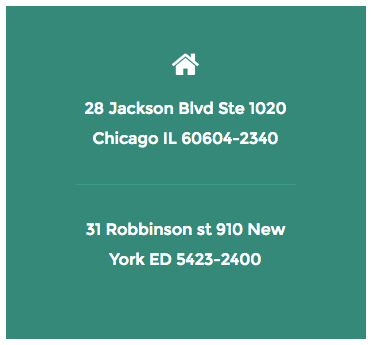
Address Widget
- Go to Appearance > Widgets and look for Inspiry Address widget.
- Use that widget in a sidebar. Provide the first and second address.
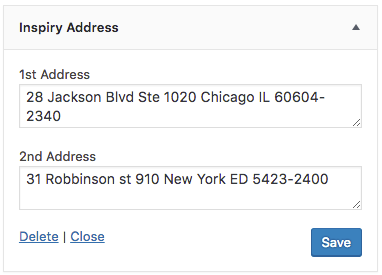
- Now check out the front end of your site and you will have the Inspiry Address widget working for your site.
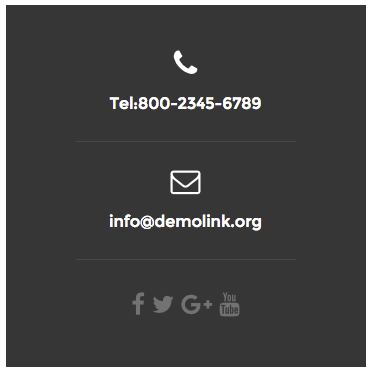
Contact Widget
- Go to Appearance > Widgets and look for Inspiry Contact widget.
- Use that widget in a sidebar. Provide the contact details.
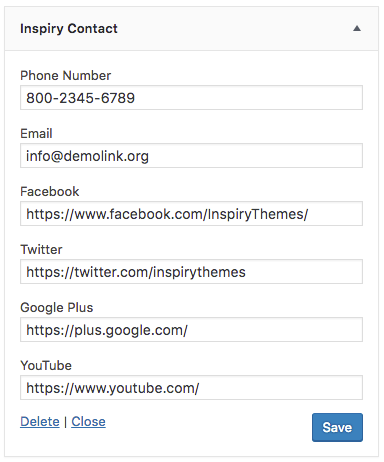
- Now check out the front end of your site and you will have the Inspiry Contact widget working for your site.
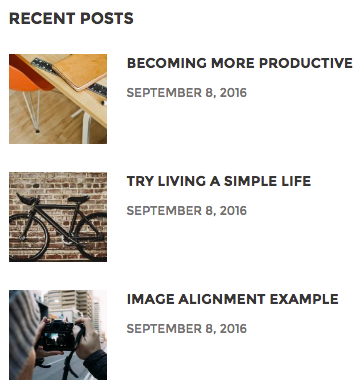
Recent Posts Widget
- Go to Appearance > Widgets and look for Inspiry Recent Posts widget.
- Use that widget in a sidebar. Provide the title, number of posts and select the sorting by.
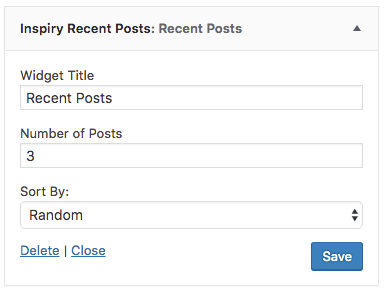
- Now check out the front end of your site and you will have the Inspiry Recent Posts widget working for your site.
Configure Header
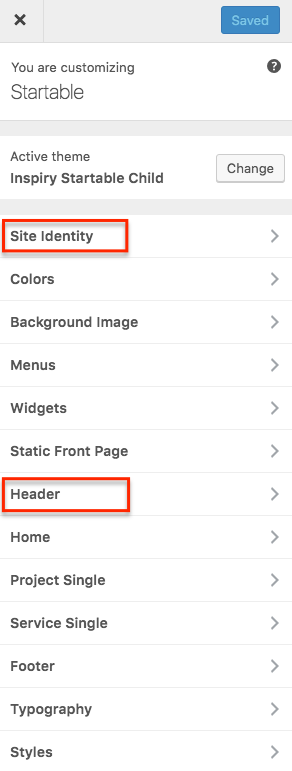
Navigate to Appearance > Customize and look into Site Identity and Header section to explore further settings.
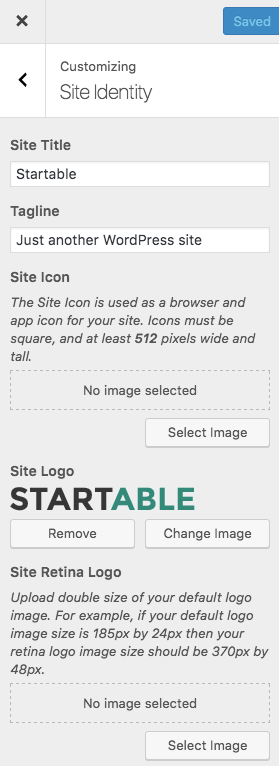
Site Identity
You can upload your site's logo, title, description tag and site icon from this section.
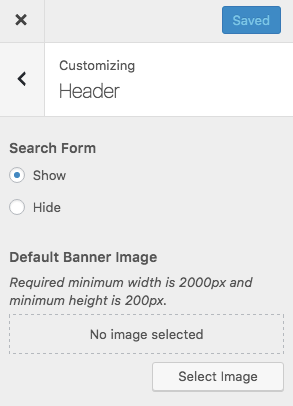
Header
You can customize header related settings in header section. As displayed in screenshot below.
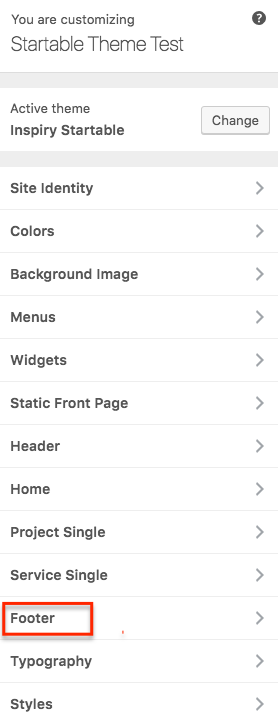
Configure Footer
Navigate to Appearance > Customize > Footer and look into Basic, Contact Us and Google Map section to explore further settings.
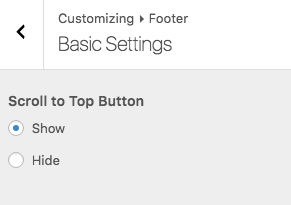
Basic Settings
You can Enable/Disable the Scroll to Top Button from this section.
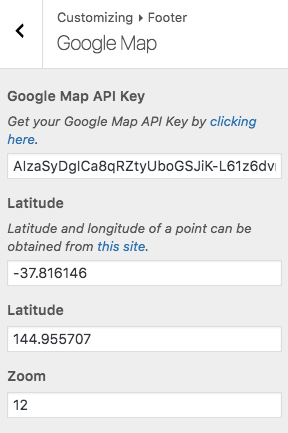
Google Map
You can configure Footer Google Map related settings in this section. As displayed in screenshot below.
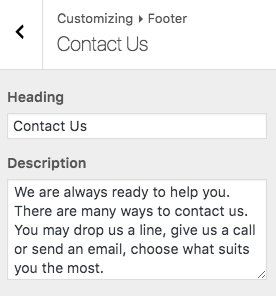
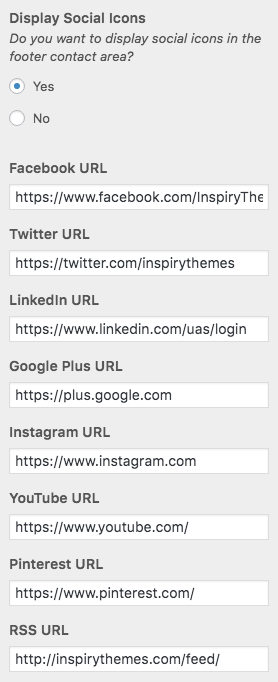
Contact Us
You can configure Footer Contact Us related settings in this section. As displayed in screenshot below.

Add Homepage Slider
To add the homepage slider you need to do two things. First, add the slider slides. Second, configure this slider settings. Please follow both steps guide given below.
1. Add Slider Slide
Go to WordPress Admin > Slides > Add New- Provide the slide title

- Provide the slide description
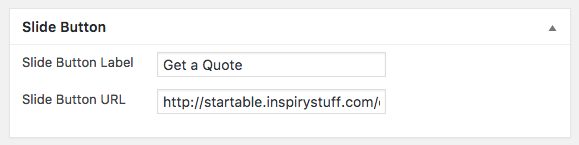
- Configure button settings
-
Provide the featured image. The image recommended size is of 2000px width and height of 800px. The bigger size images will not be cropped.
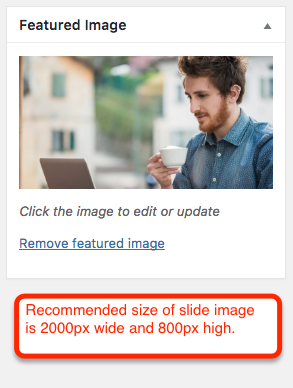
- Publish the slide once it is ready.
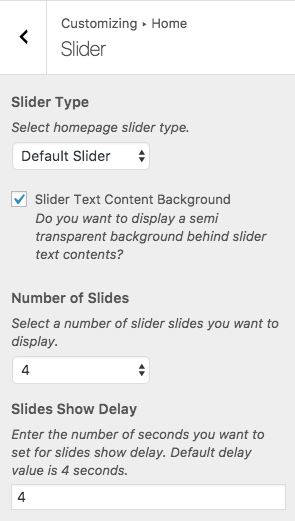
2. Slider Settings
You can configure homepage slider settings from Customizer > Home > Slider options panel as displayed in the following screenshot.
Homepage Sections Settings
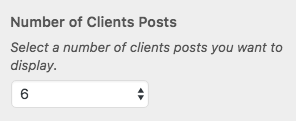
You can configure all Homepage sections settings through customizer. For example the headings, labels and number of posts related to the topic of sections. Please navigate to Appearance > Customize > Home and look into the home sections to explore further settings.
Home Sections
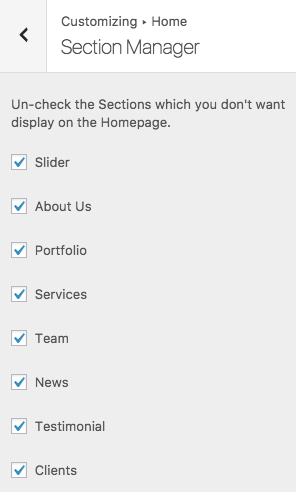
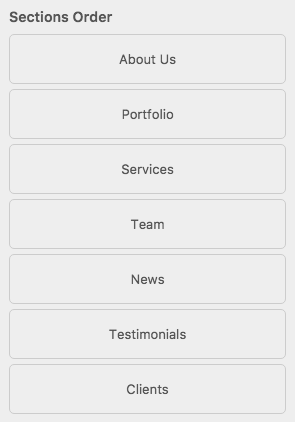
You can view a list of sections after navigating to the Appearance > Customize > Home panel. You can navigate further to each section for their settings individually.

- Section Manager
- Slider
- About Us
- Portfolio
- Service
- Team
- Blog
- Testimonial
- Client/Partner
1. Section Manager
You can Enable/Disable and reorder the homepage sections through section manager.
2. Slider
Ensure you have added the slider slides through Dashboard > Slides page, before you configure the slider settings in this section. For more detail you can consult the Home Setup > Slider section of this documentation.
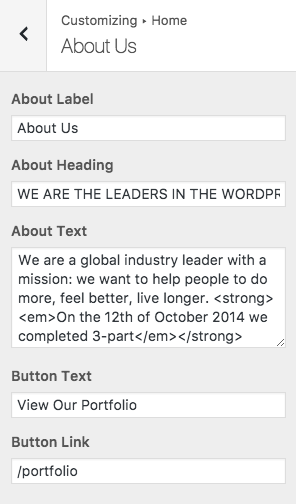
3. About Us
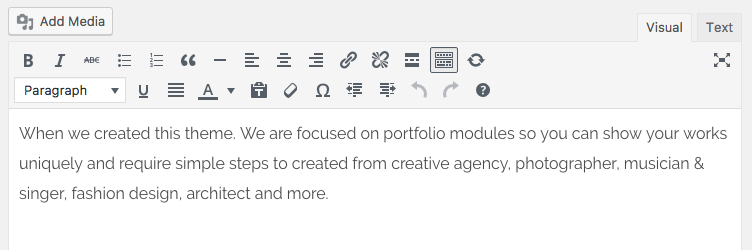
All about us settings will be set from this section. You can use all allowed HTML tags (of a post content area) in the About Text area. For example, a, br, em, strong HTML tags.
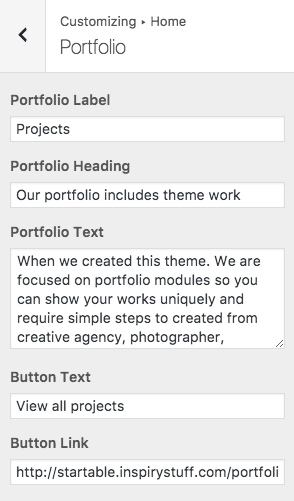
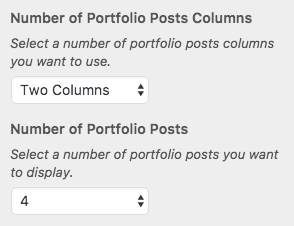
4. Portfolio
Ensure you have added the portfolio items through Dashboard > Portfolio page, before you configure the portfolio section settings in this section. For more detail you can consult the Add Contents > Add Portfolio section of this documentation.
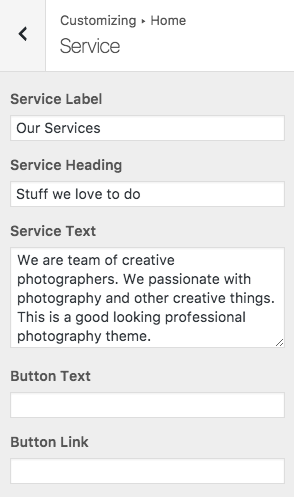
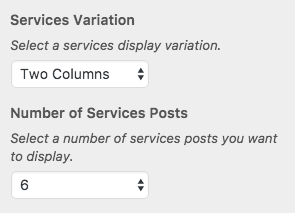
5. Service
Ensure you have added the services list through Dashboard > Services page, before you configure the services section settings in this section. For more detail you can consult the Add Contents > Add Service section of this documentation.
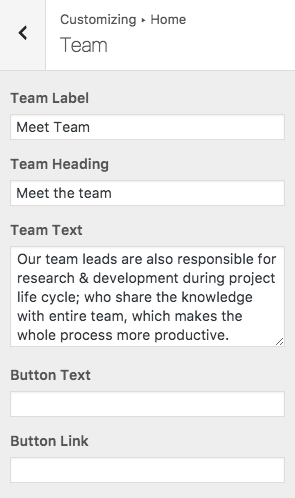
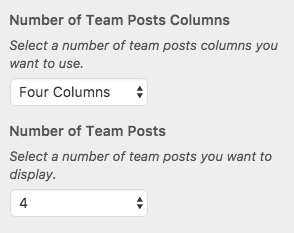
6. Team
Ensure you have added the team members through Dashboard > Team page, before you configure the team section settings in this section. For more detail you can consult the Add Contents > Add Team Member section of this documentation.
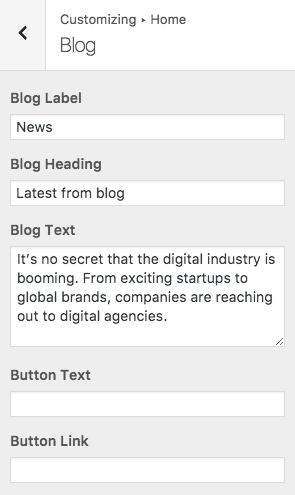
7. Blog
Ensure you have added the blog posts through Dashboard > Posts page, before you configure the blog section settings in this section. For more detail you can consult the Add Contents > Add News Post section of this documentation.
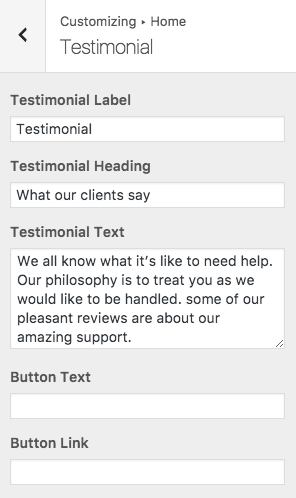
8. Testimonial
Ensure you have added the testimonials through Dashboard > Testimonials page, before you configure the testimonials section settings in this section. For more detail you can consult the Add Contents > Add Testimonial section of this documentation.
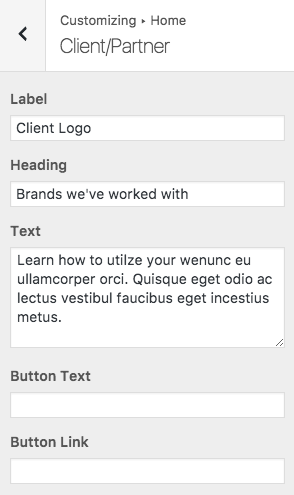
9. Client/Partner
Ensure you have added your clients through Dashboard > Clients page, before you configure the clients/partners section settings in this section. For more detail you can consult the Add Contents > Add Client section of this documentation.
Create Portfolio Page
In case of Demo Contents Import the portfolio page is already created and you do not need to follow this section.
Go to WordPress Admin > Pages > Add New- Provide the page title

- Provide the page contents
- Select the “Portfolio” template from the Page Attributes section

- Add the portfolio page related information.
- Publish the page once it is ready.
Create Services Page
In case of Demo Contents Import the services page is already created and you do not need to follow this section.
Go to WordPress Admin > Pages > Add New- Provide the page title

- Provide the page contents
- Select the “Services” template from the Page Attributes section
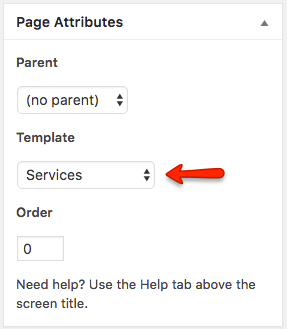
- Add the services page related information.
- Publish the page once it is ready.
Create Team Page
In case of Demo Contents Import the team page is already created and you do not need to follow this section.
Go to WordPress Admin > Pages > Add New- Provide the page title

- Provide the page contents

- Select the “Team” template from the Page Attributes section
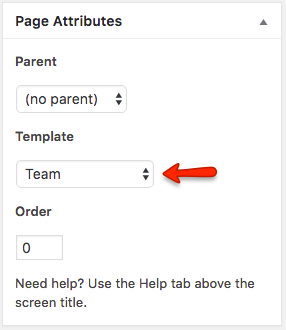
- Add the team page related information.
- Publish the page once it is ready.
Create Testimonial Page
In case of Demo Contents Import the testimonial page is already created and you do not need to follow this section.
Go to WordPress Admin > Pages > Add New- Provide the page title

- Provide the page contents
- Select the “Testimonials” template from the Page Attributes section
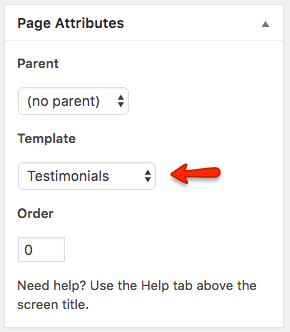
- Add the testimonials page related information.
- Publish the page once it is ready.
Create Contact Page
In case of Demo Contents Import the contact page is already created and you do not need to follow this section.
Go to WordPress Admin > Pages > Add New- Provide the page title

- Provide the page contents
- Select the “Contact” template from the Page Attributes section

- Add the contact page related information.
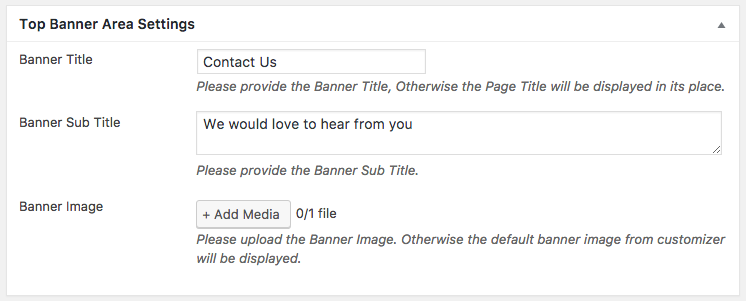
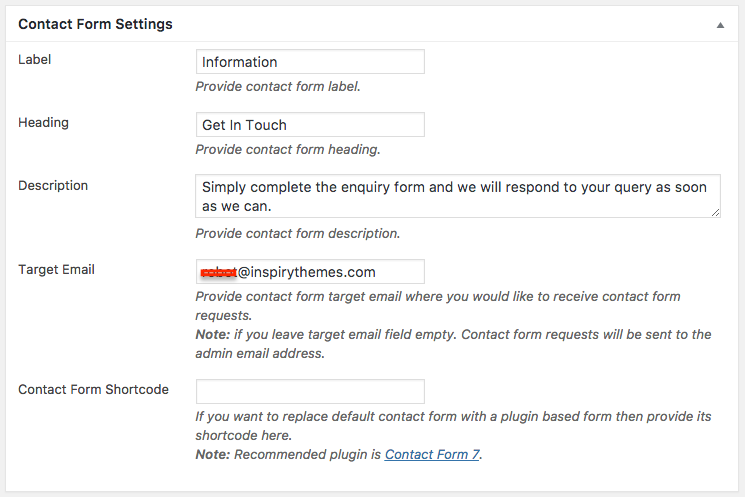
- Publish the page once it is ready.
How to set up FAQs Page
I have developed Quick and Easy FAQs plugin for this purpose.
-
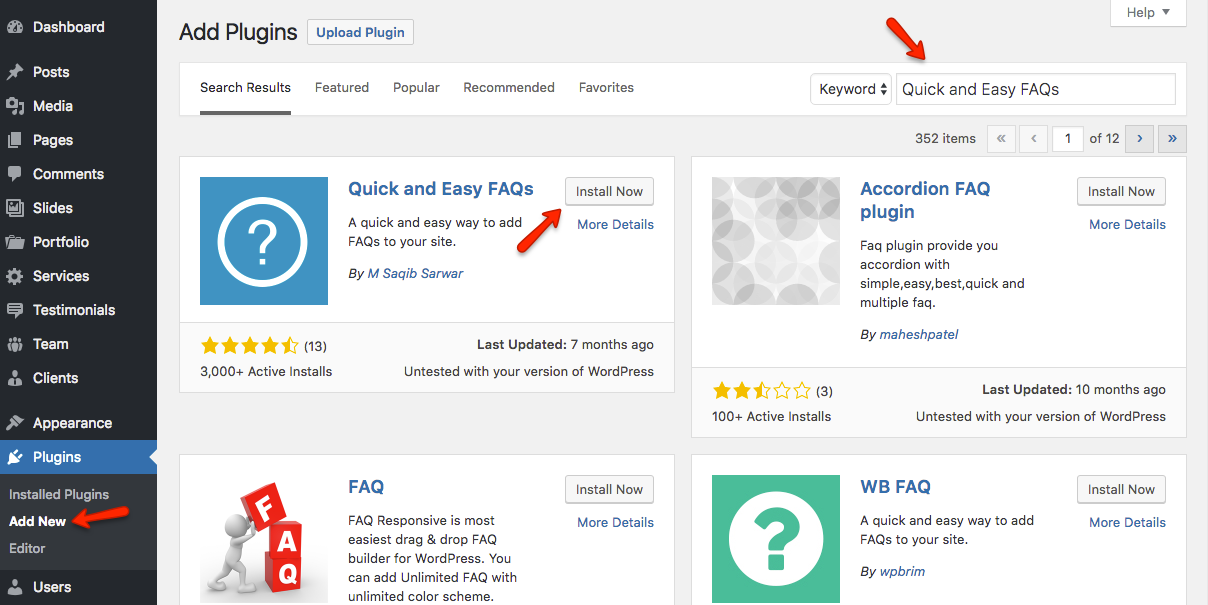
Install the Quick and Easy FAQs plugin. As guided in screenshot below.
-
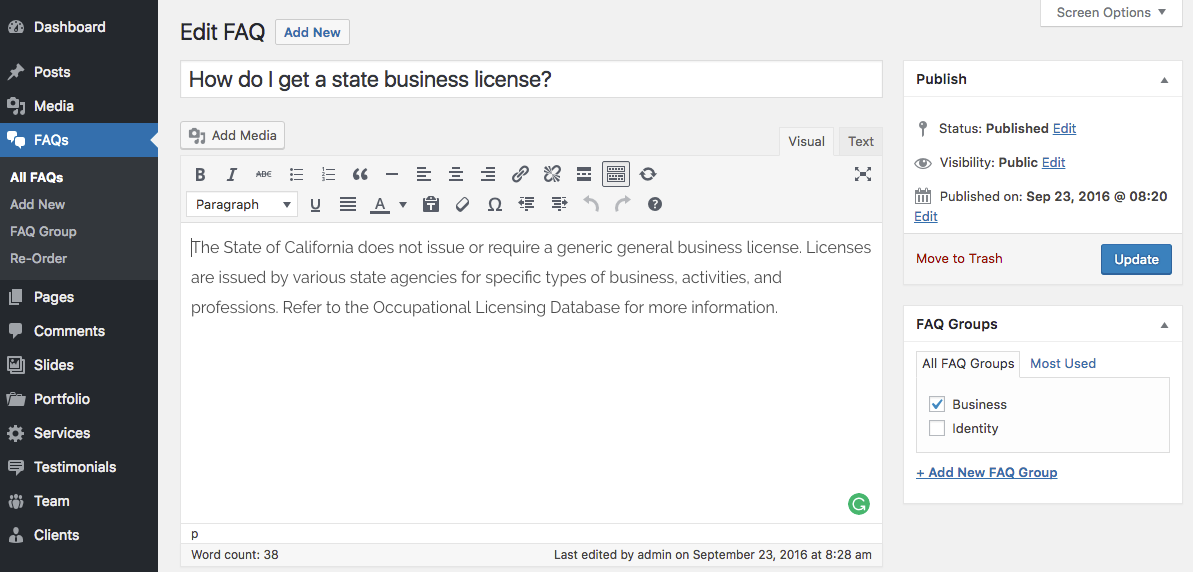
After installing and activating the plugin. You can add FAQs as displayed in screenshot below.
-
Later on you can use following shortcodes to display FAQs on a page.
- Display all FAQs in simple list style. Shortcode
[faqs] - Display all FAQs in simple list style but separated by groups. Shortcode
[faqs grouped="yes"] - Display FAQs in simple list style but filtered by given group slug. Shortcodes
[faqs filter="group-slug"]or[faqs filter="group-slug,another-group-slug"] - Display all FAQs in toggle style using following shortcode. Shortcode
[faqs style="toggle"] - Display all FAQs in toggle style but separated by groups. Shortcode
[faqs style="toggle" grouped="yes"] - Display FAQs in toggle style but filtered by given group slug. Shortcode
[faqs style="toggle" filter="group-slug"]or[faqs style="toggle" filter="group-slug,another-group-slug"] - Display all FAQs in filterable toggle style. Shortcode
[faqs style="filterable-toggle"]
- Display all FAQs in simple list style. Shortcode
How to Modify Styles
There are multiple ways you can modify the theme styles.
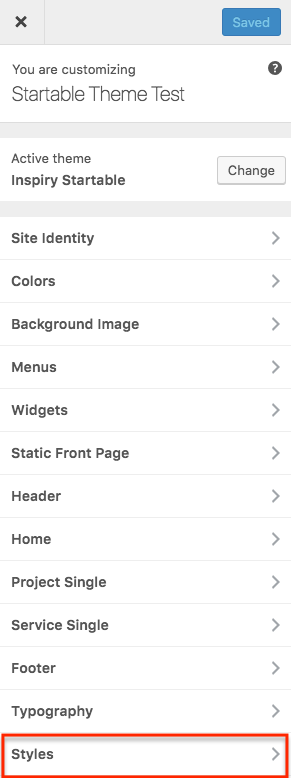
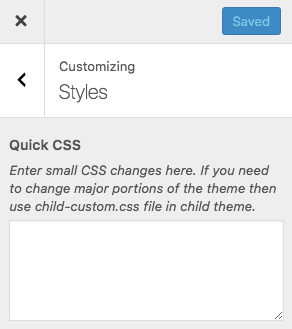
- Quick CSS - Go to Appearance > Customize and navigate to Styles to add any quick css.
- Custom CSS in Child Theme - 'child-custom.css' file is provided in child theme to add major css changes.
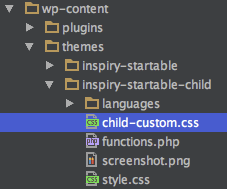
Note: It is highly recommended to use child theme for any changes that you want to make as this way you can update parent theme whenever an update becomes available. Simply copy a template file that you want to change to child theme after creating same directory structure and then modify it. For more info http://codex.wordpress.org/Child_Themes.
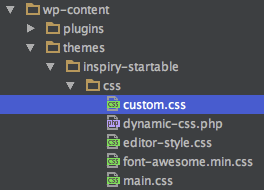
- Custom CSS in Parent Theme - if you are not using child theme then 'css/custom.css' file is provided in parent theme to add major css changes.
Use Child Theme for Customization ( Highly Recommended )
It is highly recommended to use child theme for any customization that you want to make, So that you can easily update parent theme whenever a new update becomes available. A pre-built ready to use child theme is included in the main theme pack that you have downloaded from themeforest.
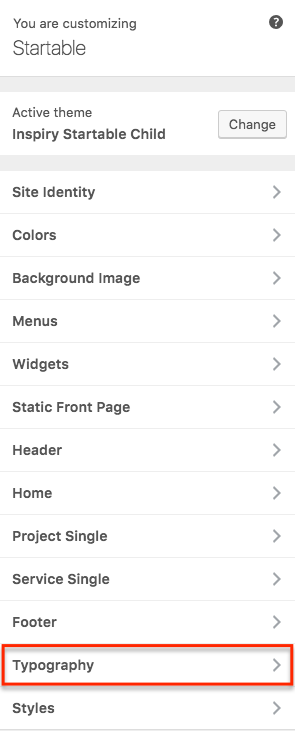
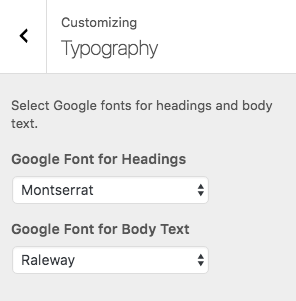
How to Modify Typography
Startable theme comes with customizer settings to modify typography.
To explore relate settings, Navigate to Customize > Typography as guided in screenshots below.
Hire Customization Services
For any customization you can consider using our theme customization services.